In this blog post, you’re going to learn the basic principles of keyboard and mouse ergonomics, so you position your devices correctly and steer clear of work-related injuries, such as neck pain, shoulder pain, and carpal tunnel syndrome.
Working safely and pain-free is guaranteed to pave your way toward optimal productivity.
Keyboard and Mouse Ergonomics 101
Keyboard Ergonomics
Let’s start with keyboard ergonomics.
So you know that your keyboard is positioned at the correct working height when:
- Your elbows are close to a body at a 90-degree angle.
- The tops of the home row keys are approximately the same height as your elbows.
- Your wrists are straight and not bent.

When your keyboard is in a non-neutral position, you might experience pain in your wrist, forearm, elbow, shoulder, and upper back muscles.
If your keyboard is positioned neutrally, your wrists are straight, and your hands are directly lined up with your forearms.
Many keyboards have foldable legs under them. Sometimes it helps to flatten the legs or to leave the keyboard at an angle. When the keyboard’s back legs are extended, it creates a positive tilt which causes your wrist to bend upward and create contact stress with the work surface.
These are non-neutral positions. Pay attention to what makes your wrist straighter.
Also, it would be best if you position your keyboard directly in front of you and your primary monitor.
 Many people working from home can find themselves working from a non-adjustable table that’s higher than their neutral elbow height.
A work surface that’s too high leads to non-optimal positioning regarding keyboard and mouse ergonomics.
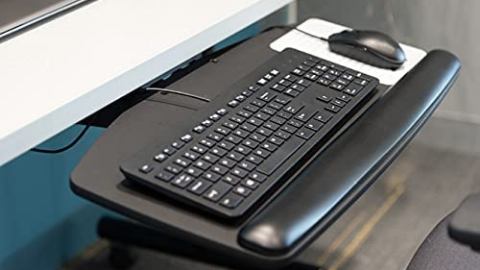
An affordable solution is to purchase a clamp-on keyboard tray and mount it beneath your desk. You can find various height-adjustable options allowing you to raise, lower, and tilt the keyboard.
It’s recommended that the keyboard platform is flat or tilted downward with a negative tilt. It’s not recommended to have the keyboard tilt upward, called a positive tilt, as this forces you to bend your wrist back, which can lead to carpal tunnel problems over time.
Mouse Ergonomics
Moving on to mouse ergonomics, let’s take a look at your mouse location. When using it, you want to keep your mouse close to your keyboard and use comfortable positions that promote a flat neutral wrist.
Try this technique when using your mouse:
- Gently drop your arm and hand as one unit onto the mouse with your upper arm hanging freely from your shoulder.
- Then center your palm over the mouse and let your fingertips hang over the front and sides.
- When moving the mouse, use your shoulder muscles to generate the force and not your arm by making small circular motions.
- And when clicking the mouse, use the midsection of your finger instead of your fingertip.
Mousing Arm
Significant pain symptoms are related to the mouse or in the mousing arm, and those symptoms can range from wrist, elbow, forearm, and shoulder pain.

Here’s how to set up your mouse for neutral postures. Are you ready?
Position the mouse directly in front of your mousing shoulder. That’s it.
More than 90% of right arm and shoulder pain is related to the outward positioning of the mouse relative to the right shoulder.
The length of a conventional keyboard that comes with a number pad attached to it is too long for most of us, so we end up mousing with an outstretched reach far to the right of a neutral position.
So you might want to consider getting a narrower keyboard or one with a detachable number pad if you’re finding that you don’t have much use for it.
Vertical Mouse
If you’re experiencing numbness or tingling in your hand, you might want to look into getting a vertical mouse.

A vertical mouse will keep your hand in a thumbs-up posture, minimize wrist extension, or reduce carpal tunnel pressure.
Another solution is to try switching to the other hand for a while to give your uncomfortable hand a rest.
Don’t forget to change the mouse button settings in your computer’s control panel.
Congratulations! You’re now an expert at keyboard and mouse ergonomics.
